The Pillsbury+ Birthday Cake
I’ve told you once before that I am a Pillsbury Dough-Girl!
Pillsbury has been my go-to brand for cake mix since I was a youngin’ in the kitchen. You know, back when the sprinkles in the Funfetti cake mix were wrapped in an aluminum pouch in the box!

Baking a homemade cake requires a lot of work and it is nice to have an alternative when you want to do something simple. My folks love cake and I love to make cake for them, but it can be a very difficult task when most of your loved ones have birthdays in July. Someone is bound to get a boxed cake mix, goddammit! Since baking homemade cakes, however, I can’t go back to the simple straight-out-the-box cake mix. I have tried many methods to vamp up the box cake mix and this one is my favorite.
In a rush to whip up some cake? Not to worry, I got your back!
The recipe below makes for a 2 layered birthday cake, but if you would like to make a 4 layered 9-inch cake, just double the recipe.
Here is my Pillsbury+ Birthday Cake recipe!
Equipment
Mixing bowls
Whisk
Liquid measuring cups
2 9-inch cake pans
Parchment paper
Cake strips (optional)
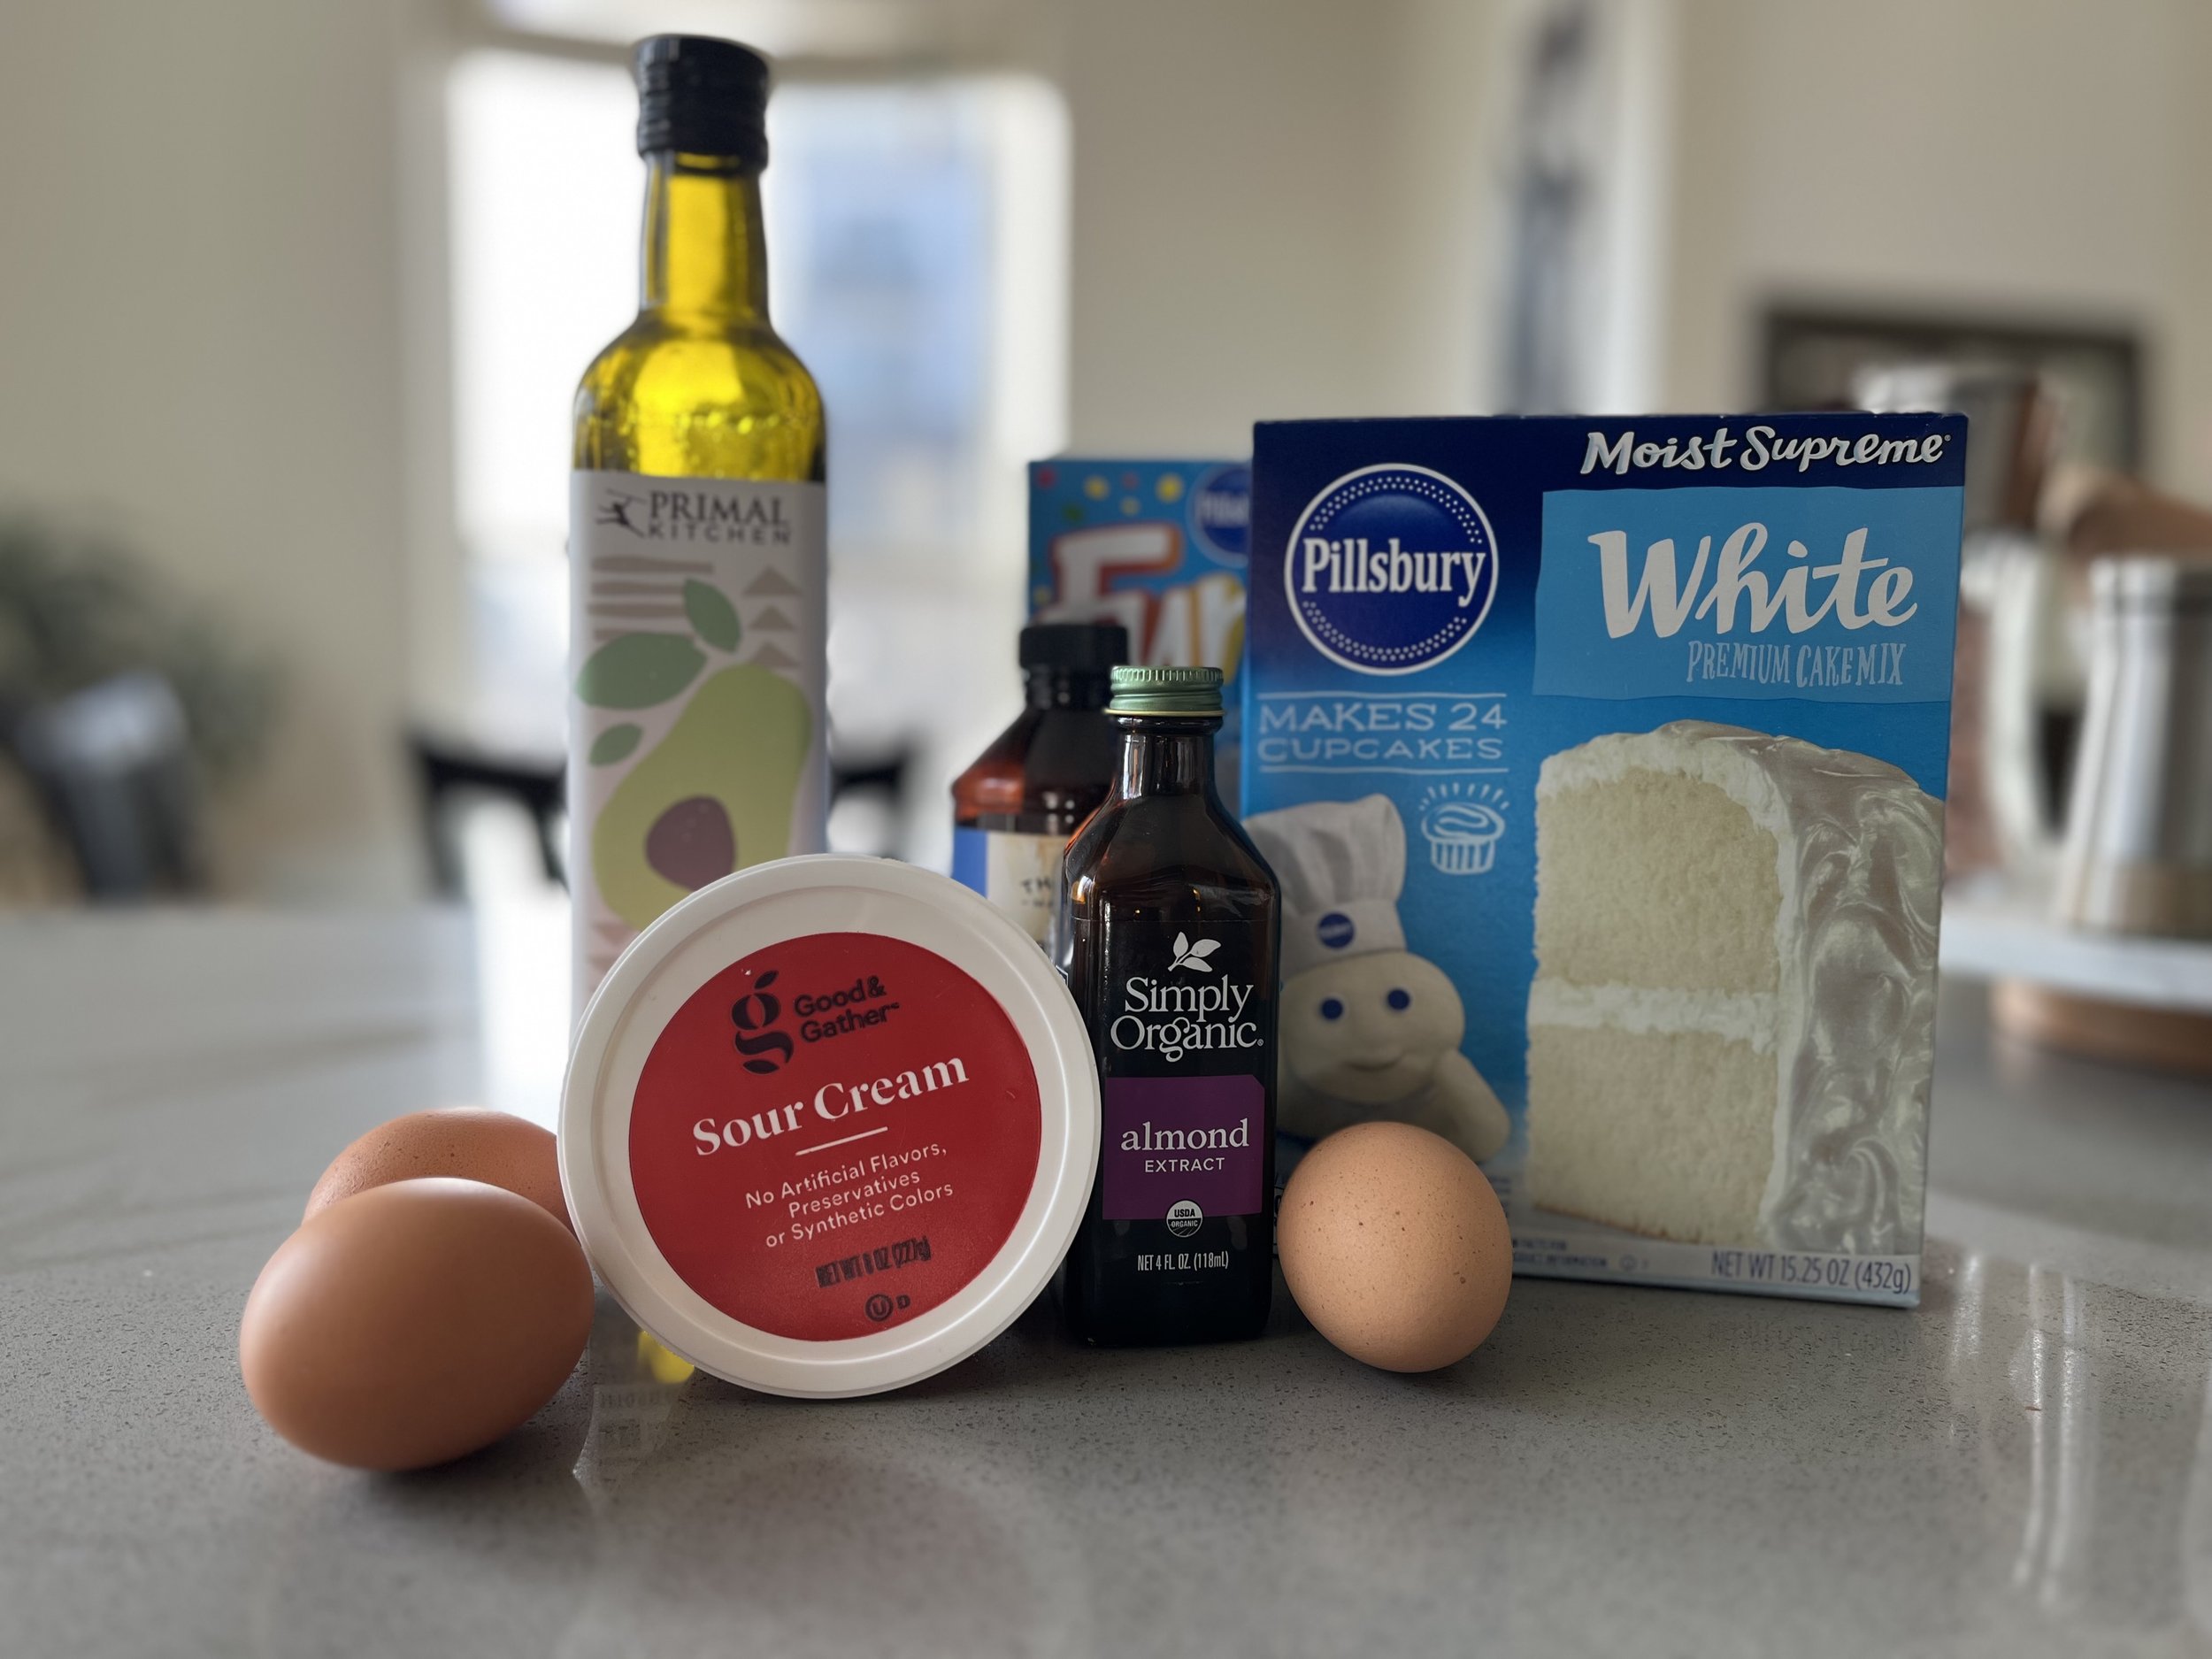
Ingredients
1 pack cake mix (you can use any brand though I can’t vouch for them!)
¼ cup vegetable oil (or any flavorless oil - I use avocado oil)
3 eggs
4 tablespoons melted butter
½ teaspoon vanilla extract
¼ teaspoon almond extract
1 cup water or almond milk
¼ cup sour cream
Instructions
First thing to know: this cake is super simple. No need to stress or overthink it. The ingredients have no special order!
Set your oven to 350 degrees Fahrenheit.
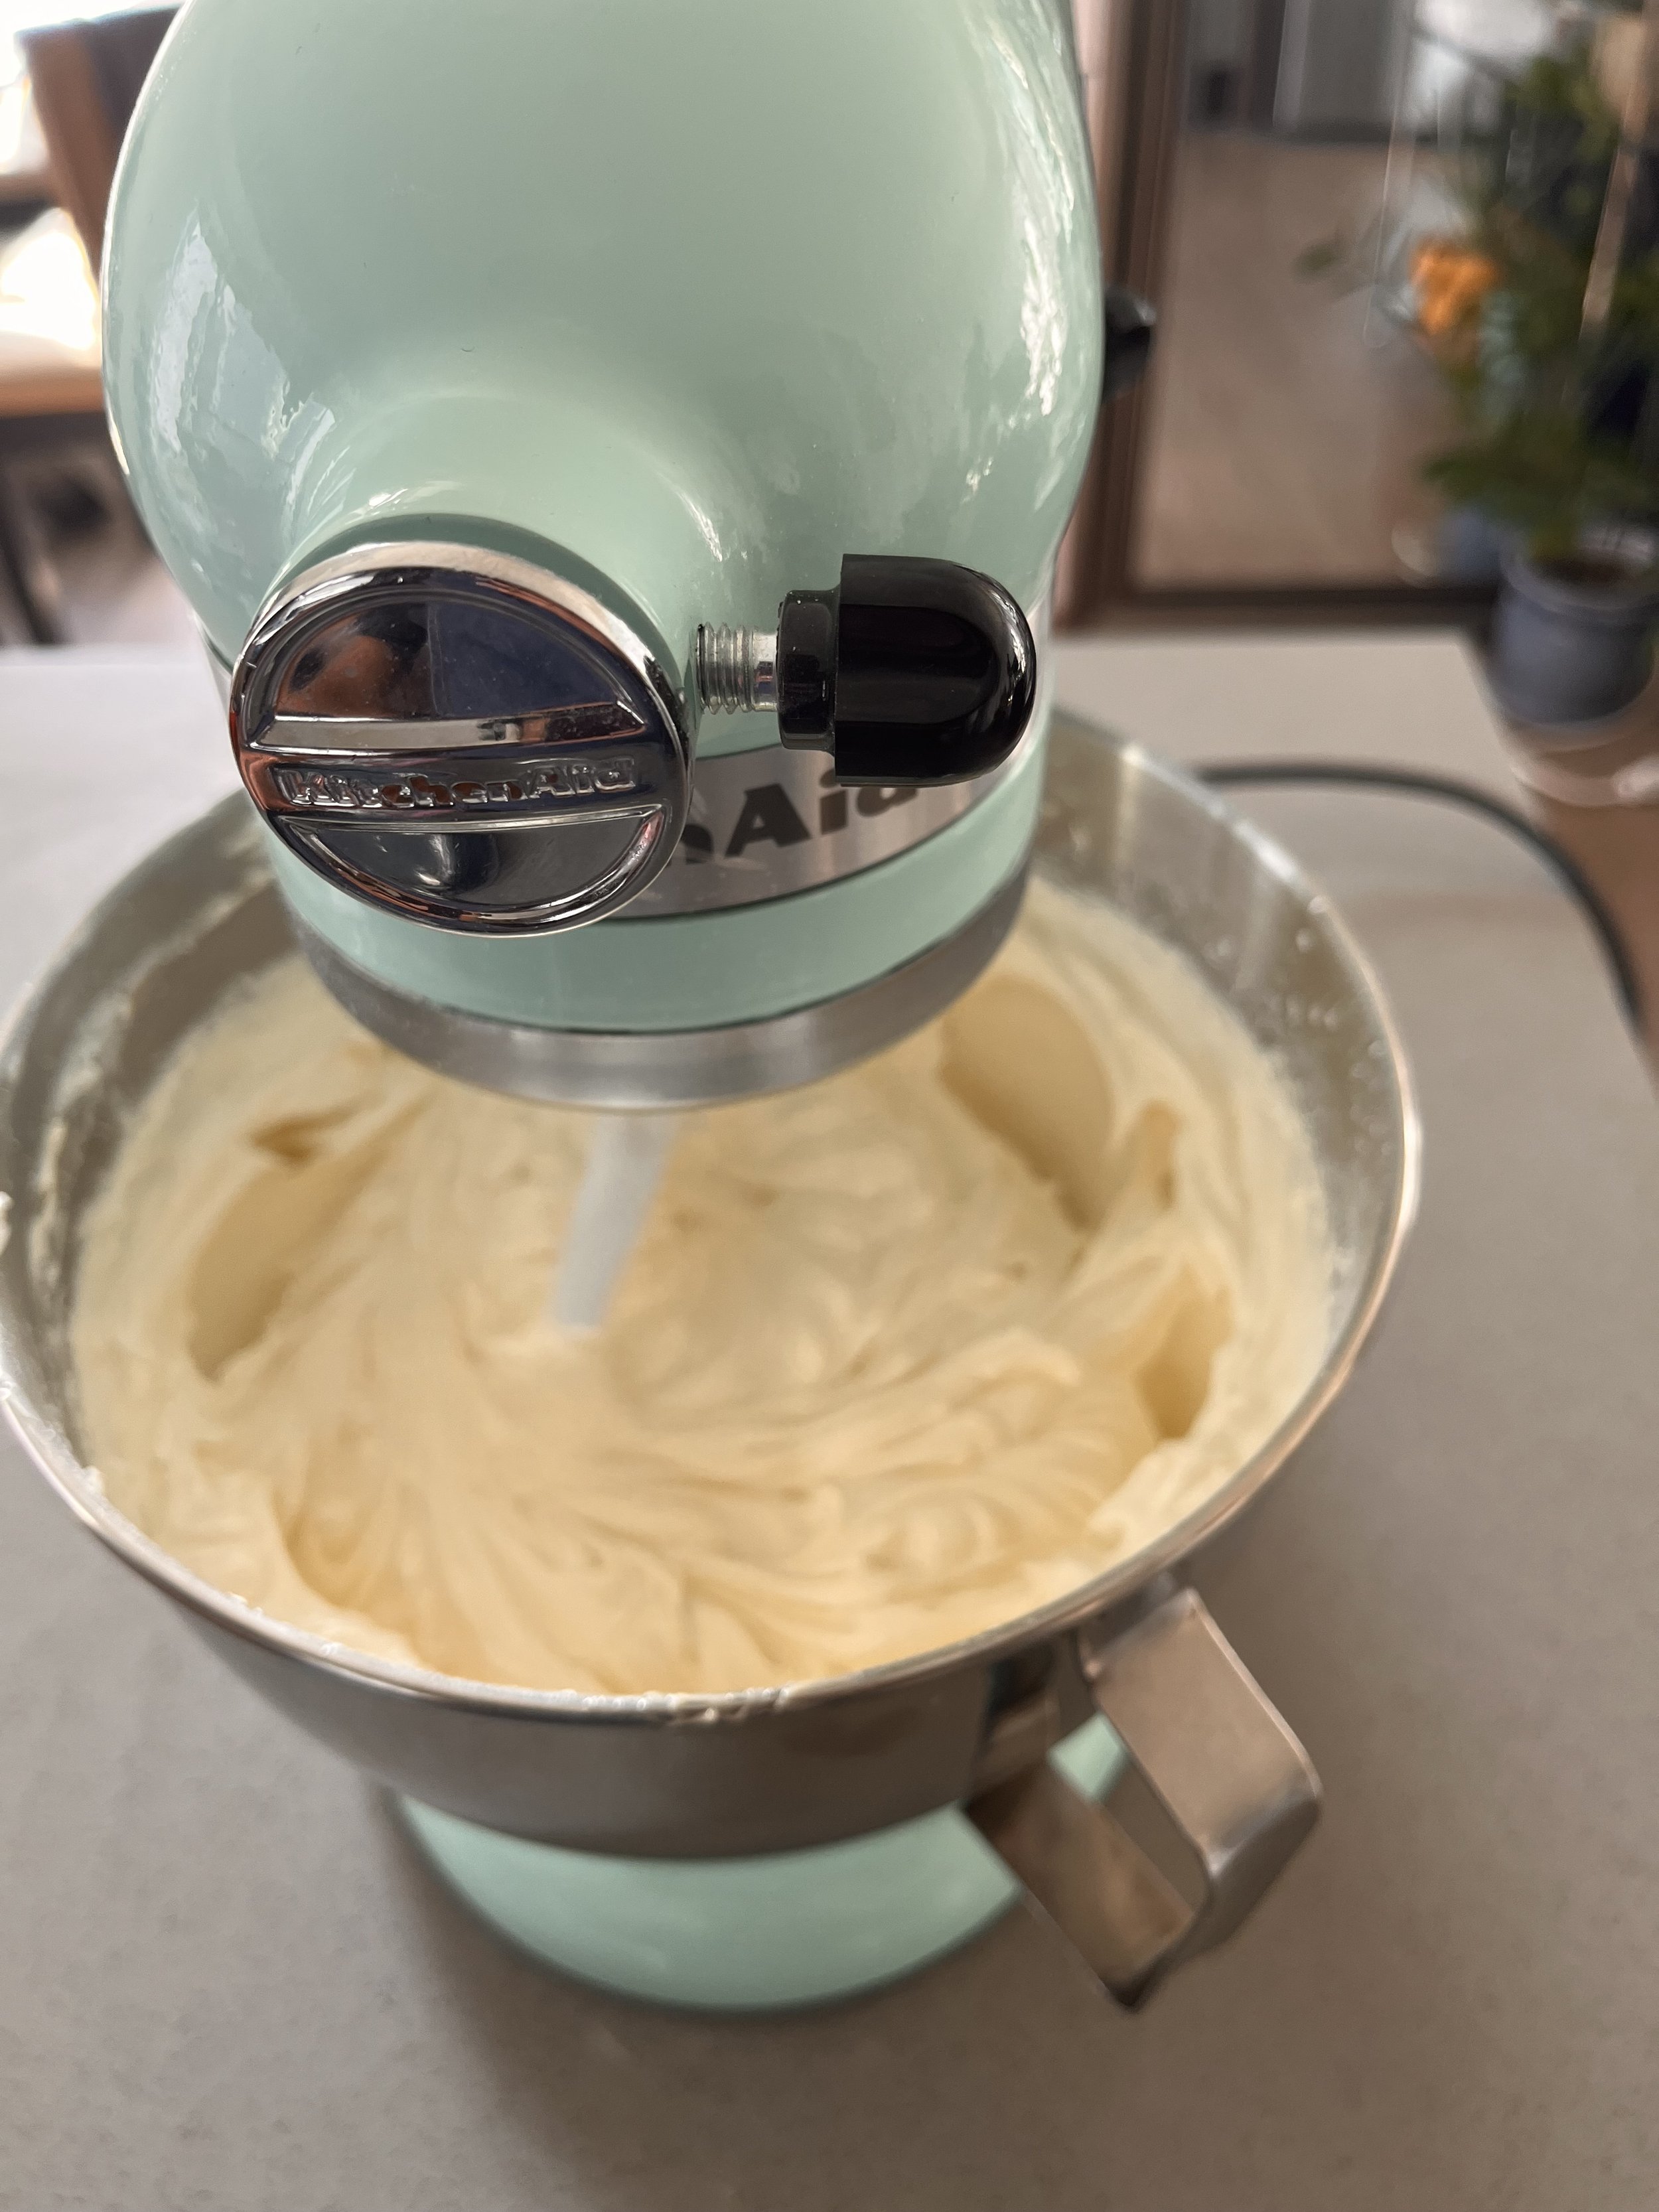
Grab your mixing bowl and add all wet ingredients to the bowl and give them a good mix.
Add in your box cake mix and whisk until combined.
Prepare your pans: cut out a 9-inch round piece of parchment paper to line the bottom of your baking pan. You can do this by placing your baking pan right-side-up on a sheet of parchment paper and trace the base parameter of the pan. Cut out the shape and discard the excess paper. Grease the bottom of the pan to adhere the parchment paper. Be sure to grease the sides of the pan so that the edges of the cake do not stick!
An optional step is to use cake strips! Cake strips prevent the top of your cakes from forming that big dome! The cake strips regulate the way heat is distributed while baking by keeping the edges of the pan cooler so that the middle of the cake is able to bake at a comparable rate. It allows for a nice, even bake with no crisped edges and no leveling of the cake. To use cake strips, soak them in water and wring them out before attaching to the outside of your pans.
Evenly distribute the batter into baking pans.
Bake cakes for 23-25 minutes.
Allow cakes to cool in the pan for 10 minutes before flipping them onto a cooling rack. Cool completely before assembling.
Now let’s discuss why you are using the ingredients listed above.
Vegetable oil and melted butter: This combination in cakes yields excellent results for the best of both worlds; moisture and flavor. Since oil is liquid at room temperature, it keeps the cake moist. Additionally, the oil coats the flour better than butter, to help prevent the gluten formation while mixing the batter. The reverse creaming method best illustrates this concept though it is not necessary in this recipe! Butter is the ingredient that amplifies the flavor! It’s a fat that locks in moisture and adds structure!
Sour cream: Adds moisture to the cake! The acidity in the sour cream behaves as a tenderizer to the gluten in the flour. In order for the acid to do its job, it has to react with something. That something is baking soda. Not to worry, the box cake mix has a leavaning agent like baking soda in it, so there’s no need to add it.
Vanilla and almond extracts: Adds flavor to the cake! Most box mixes have artificial flavors added to them along with preservatives which in my opinion can make the cake taste like plastic. Adding a good quality flavoring can amplify the flavor of your cake while masking the artificial taste.
I hope you didn’t think I would leave you hanging. What’s a birthday cake without frosting?!
Frosting is what makes a cake, cake. If the frosting on the cake is not good then the whole cake is ruined! This birthday cake recipe calls for a classic frosting. I am a huge fan of wedding cake and love how an almond flavored buttercream pairs with a white cake. So, that is what we are making! You can replace the almond flavor with any flavor of your choice, but you might regret it ;).
I have played around with several Swiss Meringue Buttercreams, American Buttercreams, and Mock Meringue Buttercreams, and have found that the butter in buttercream speaks way too loudly. I needed something that had profound flavor with just a hint of butter. Remember, buttercream is only going to be as good as the type of butter you decide to use. So don’t skimp out on a high quality butter.
This recipe yields enough frosting for a 4 tiered 9-inch cake.
Here is how I do it!
Equipment
Stand mixer w/ whisk and paddle attachment
Mixing bowl
Rubber spatula
Hand mixer
Ingredients
200 grams pasteurized egg whites
300 grams caster sugar
260 grams powdered sugar
206 grams vegetable shortnening
414 grams unsalted butter
Pinch of salt
1-2 tablespoons almond extract (or whatever flavor you’d like, I’d recommend not dump all tablespoons in at once. Flavor to your liking - you can even try adding flavor 1 teaspoon at a time as both vanilla and almond are potent flavors)
Purple food coloring (optional)
Food coloring (optional)
Instructions
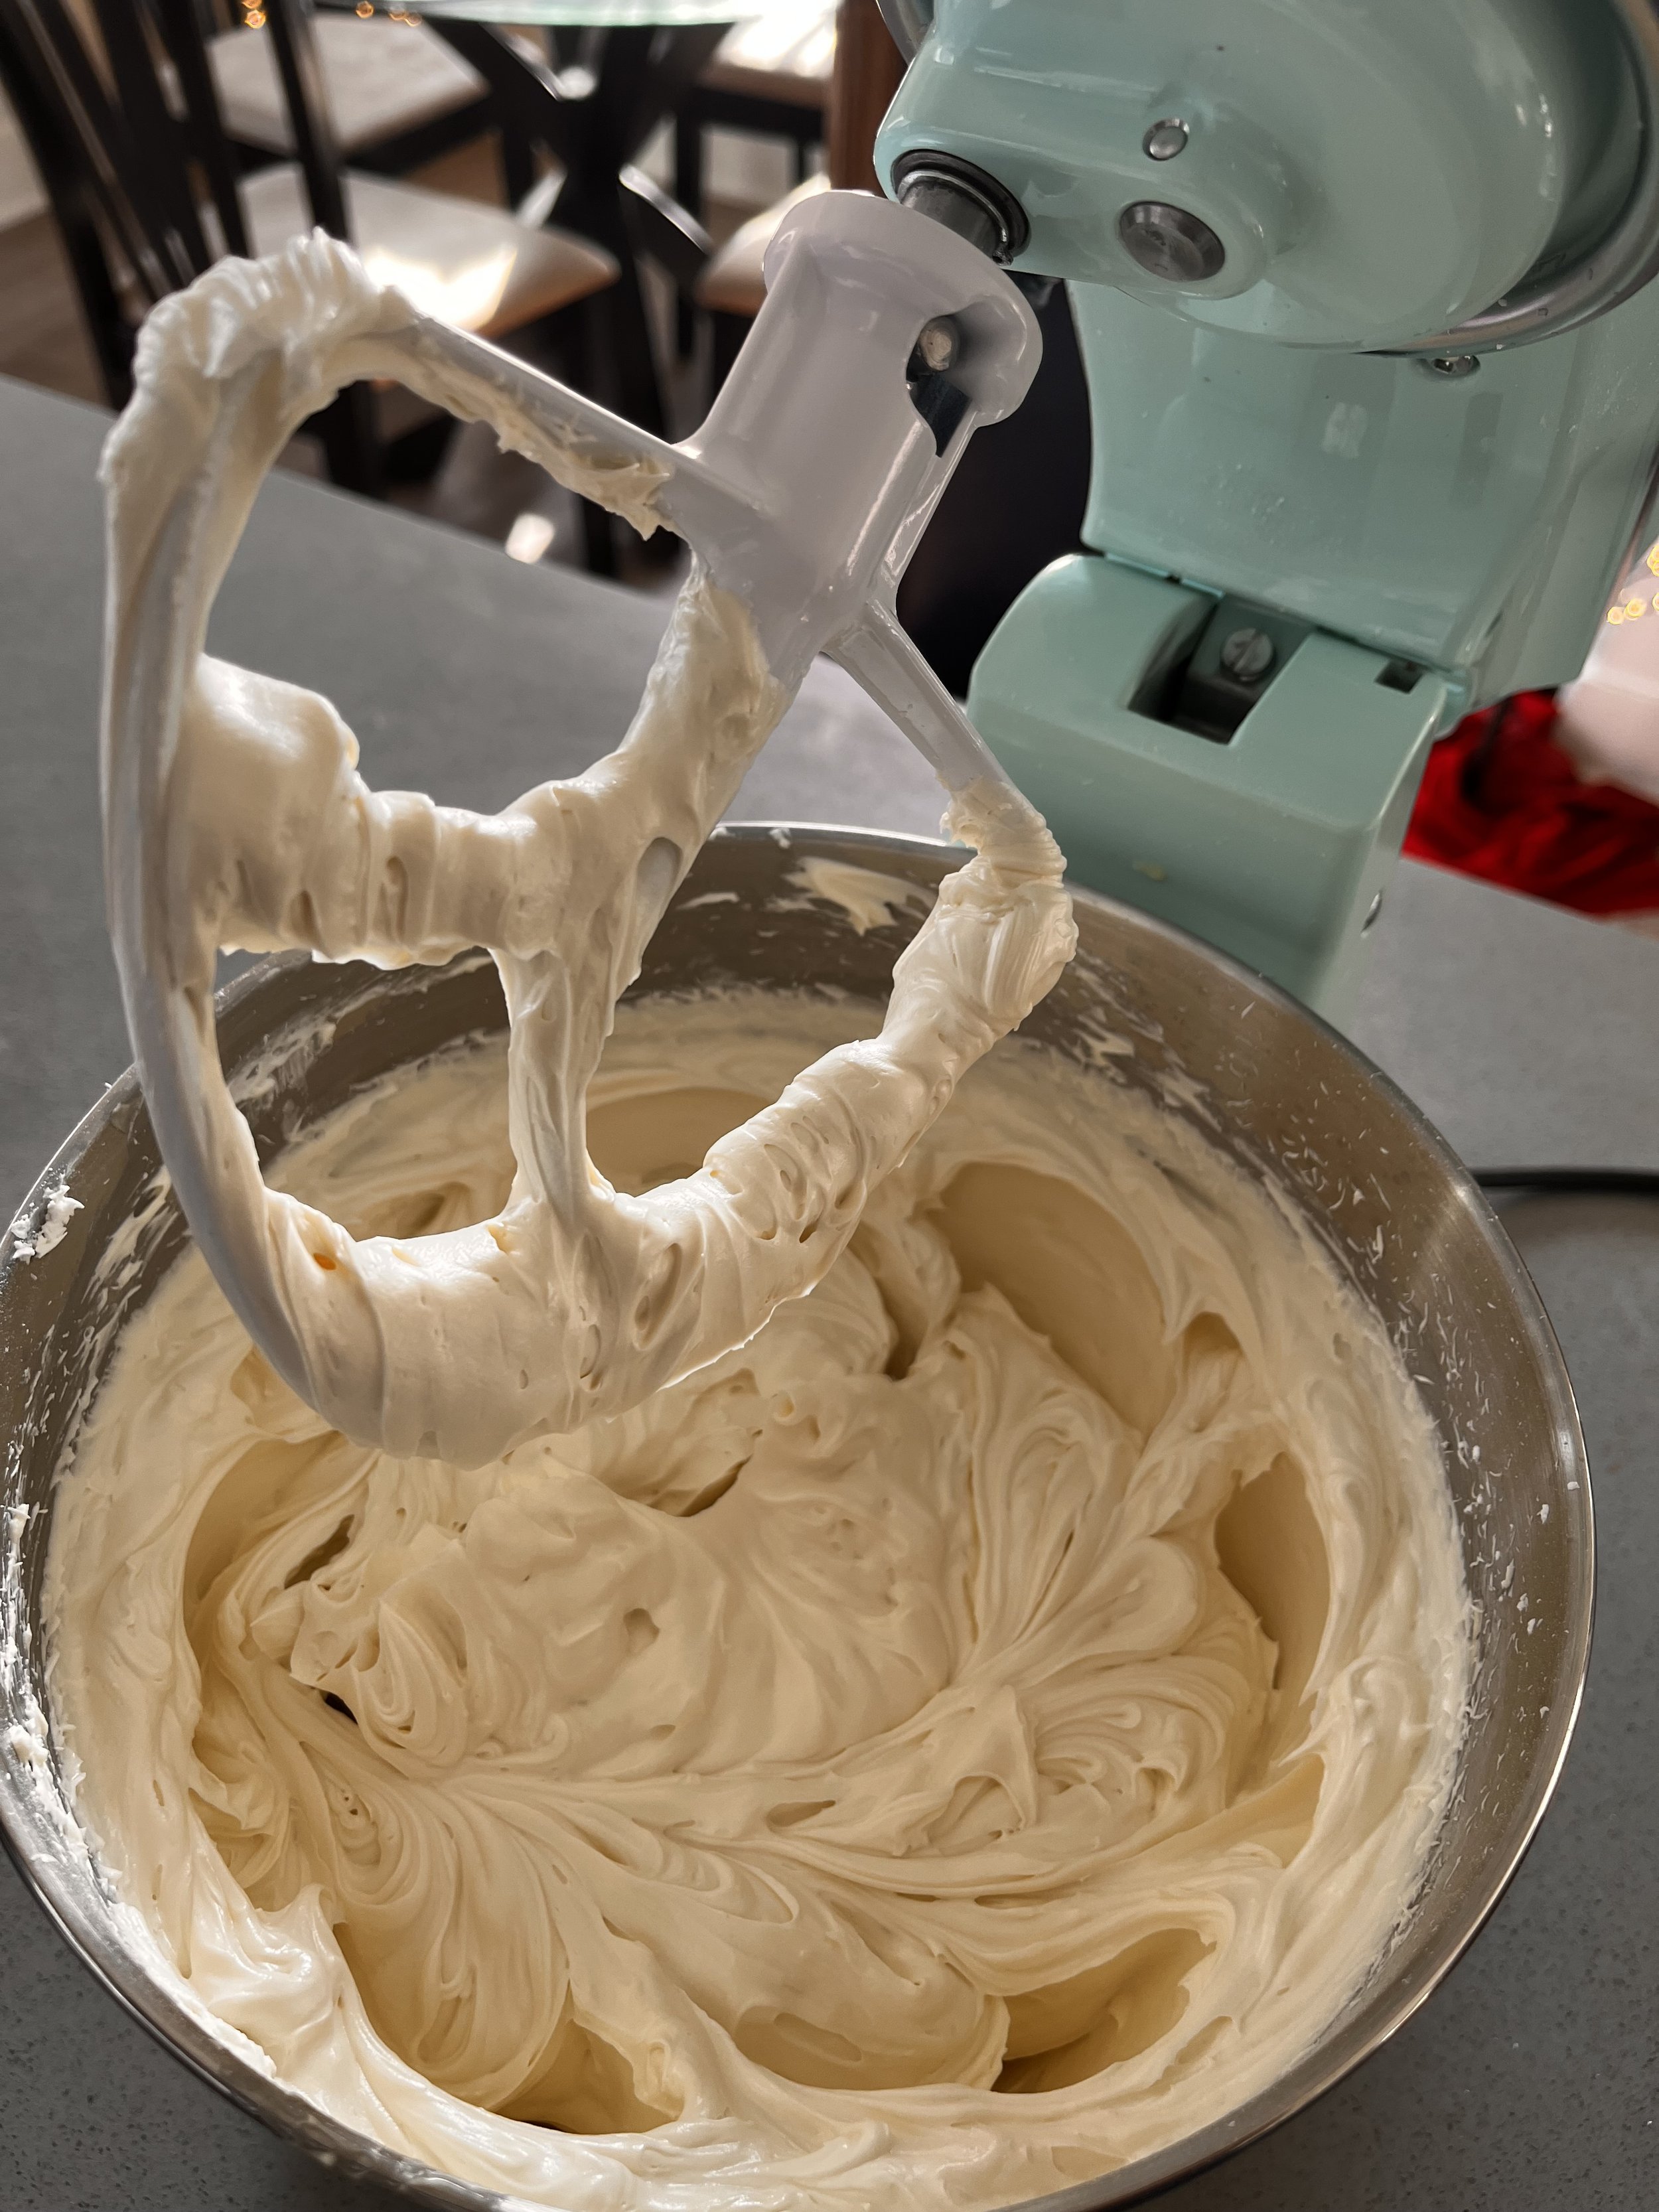
In a stand mixer with a whisk attachment, combine pasteurized egg whites and caster sugar and mix on medium-high speed until the meringue forms stiff peaks. It takes about 10 minutes! *Note: your stand mixer bowl must be clean in order for meringue to form. If there is any trace of fat in the bowl it will NOT happen.
While the meringue is mixing, prepare your fats by softening the butter and the shortening. Place your butter and shortening in a large bowl and heat in the microwave for about 30 seconds or until the butter is soft, not melted. With a hand mixer, mix the contents in the bowl until creamed.
Add the fats to the mixing bowl and continue to mix until the butter is lighter in color. This takes roughly 10-15 minutes. The longer you whip air into the butter, the less buttery the frosting will taste in the end (which is what we want)!
Add in the powdered sugar and mix on low until just combined. Add in your choice of flavoring, hopefully its the almond extract, and pinch of salt.
Switch to the paddle attachment to smooth air bubbles out of the buttercream for an additional 10 minutes.
Optional: For super white frosting, add a drop of purple food coloring to counteract with the yellow color from the butter!
Let’s Assemble!
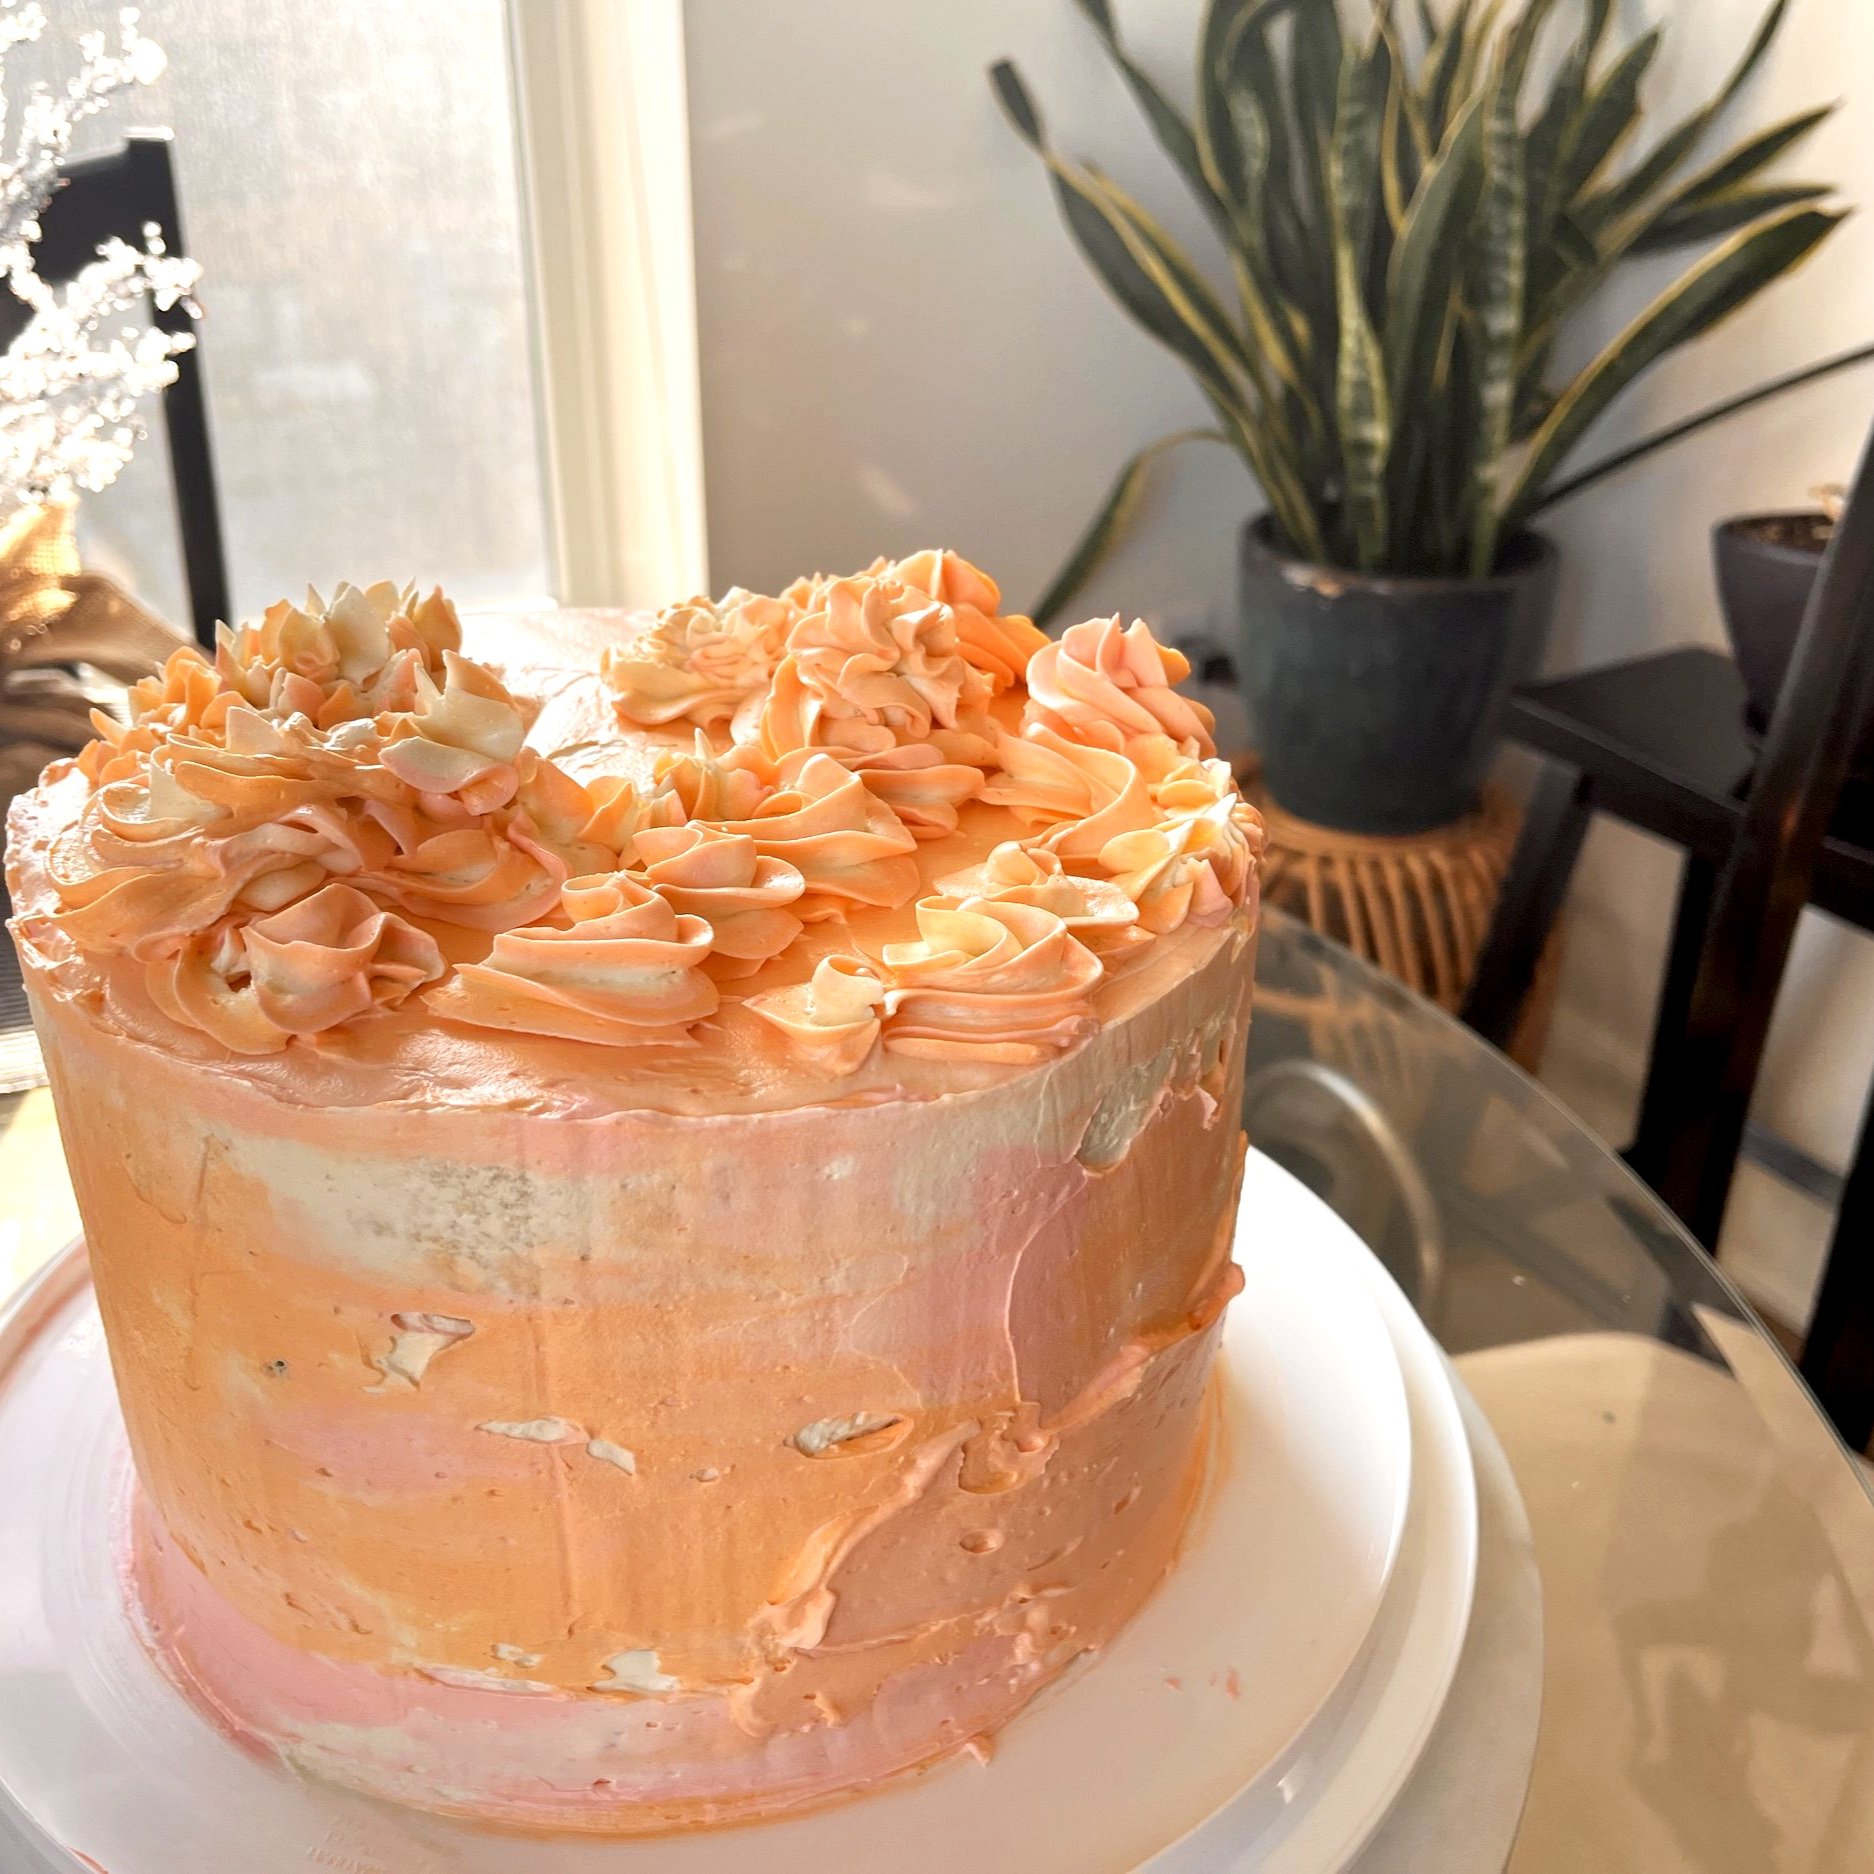
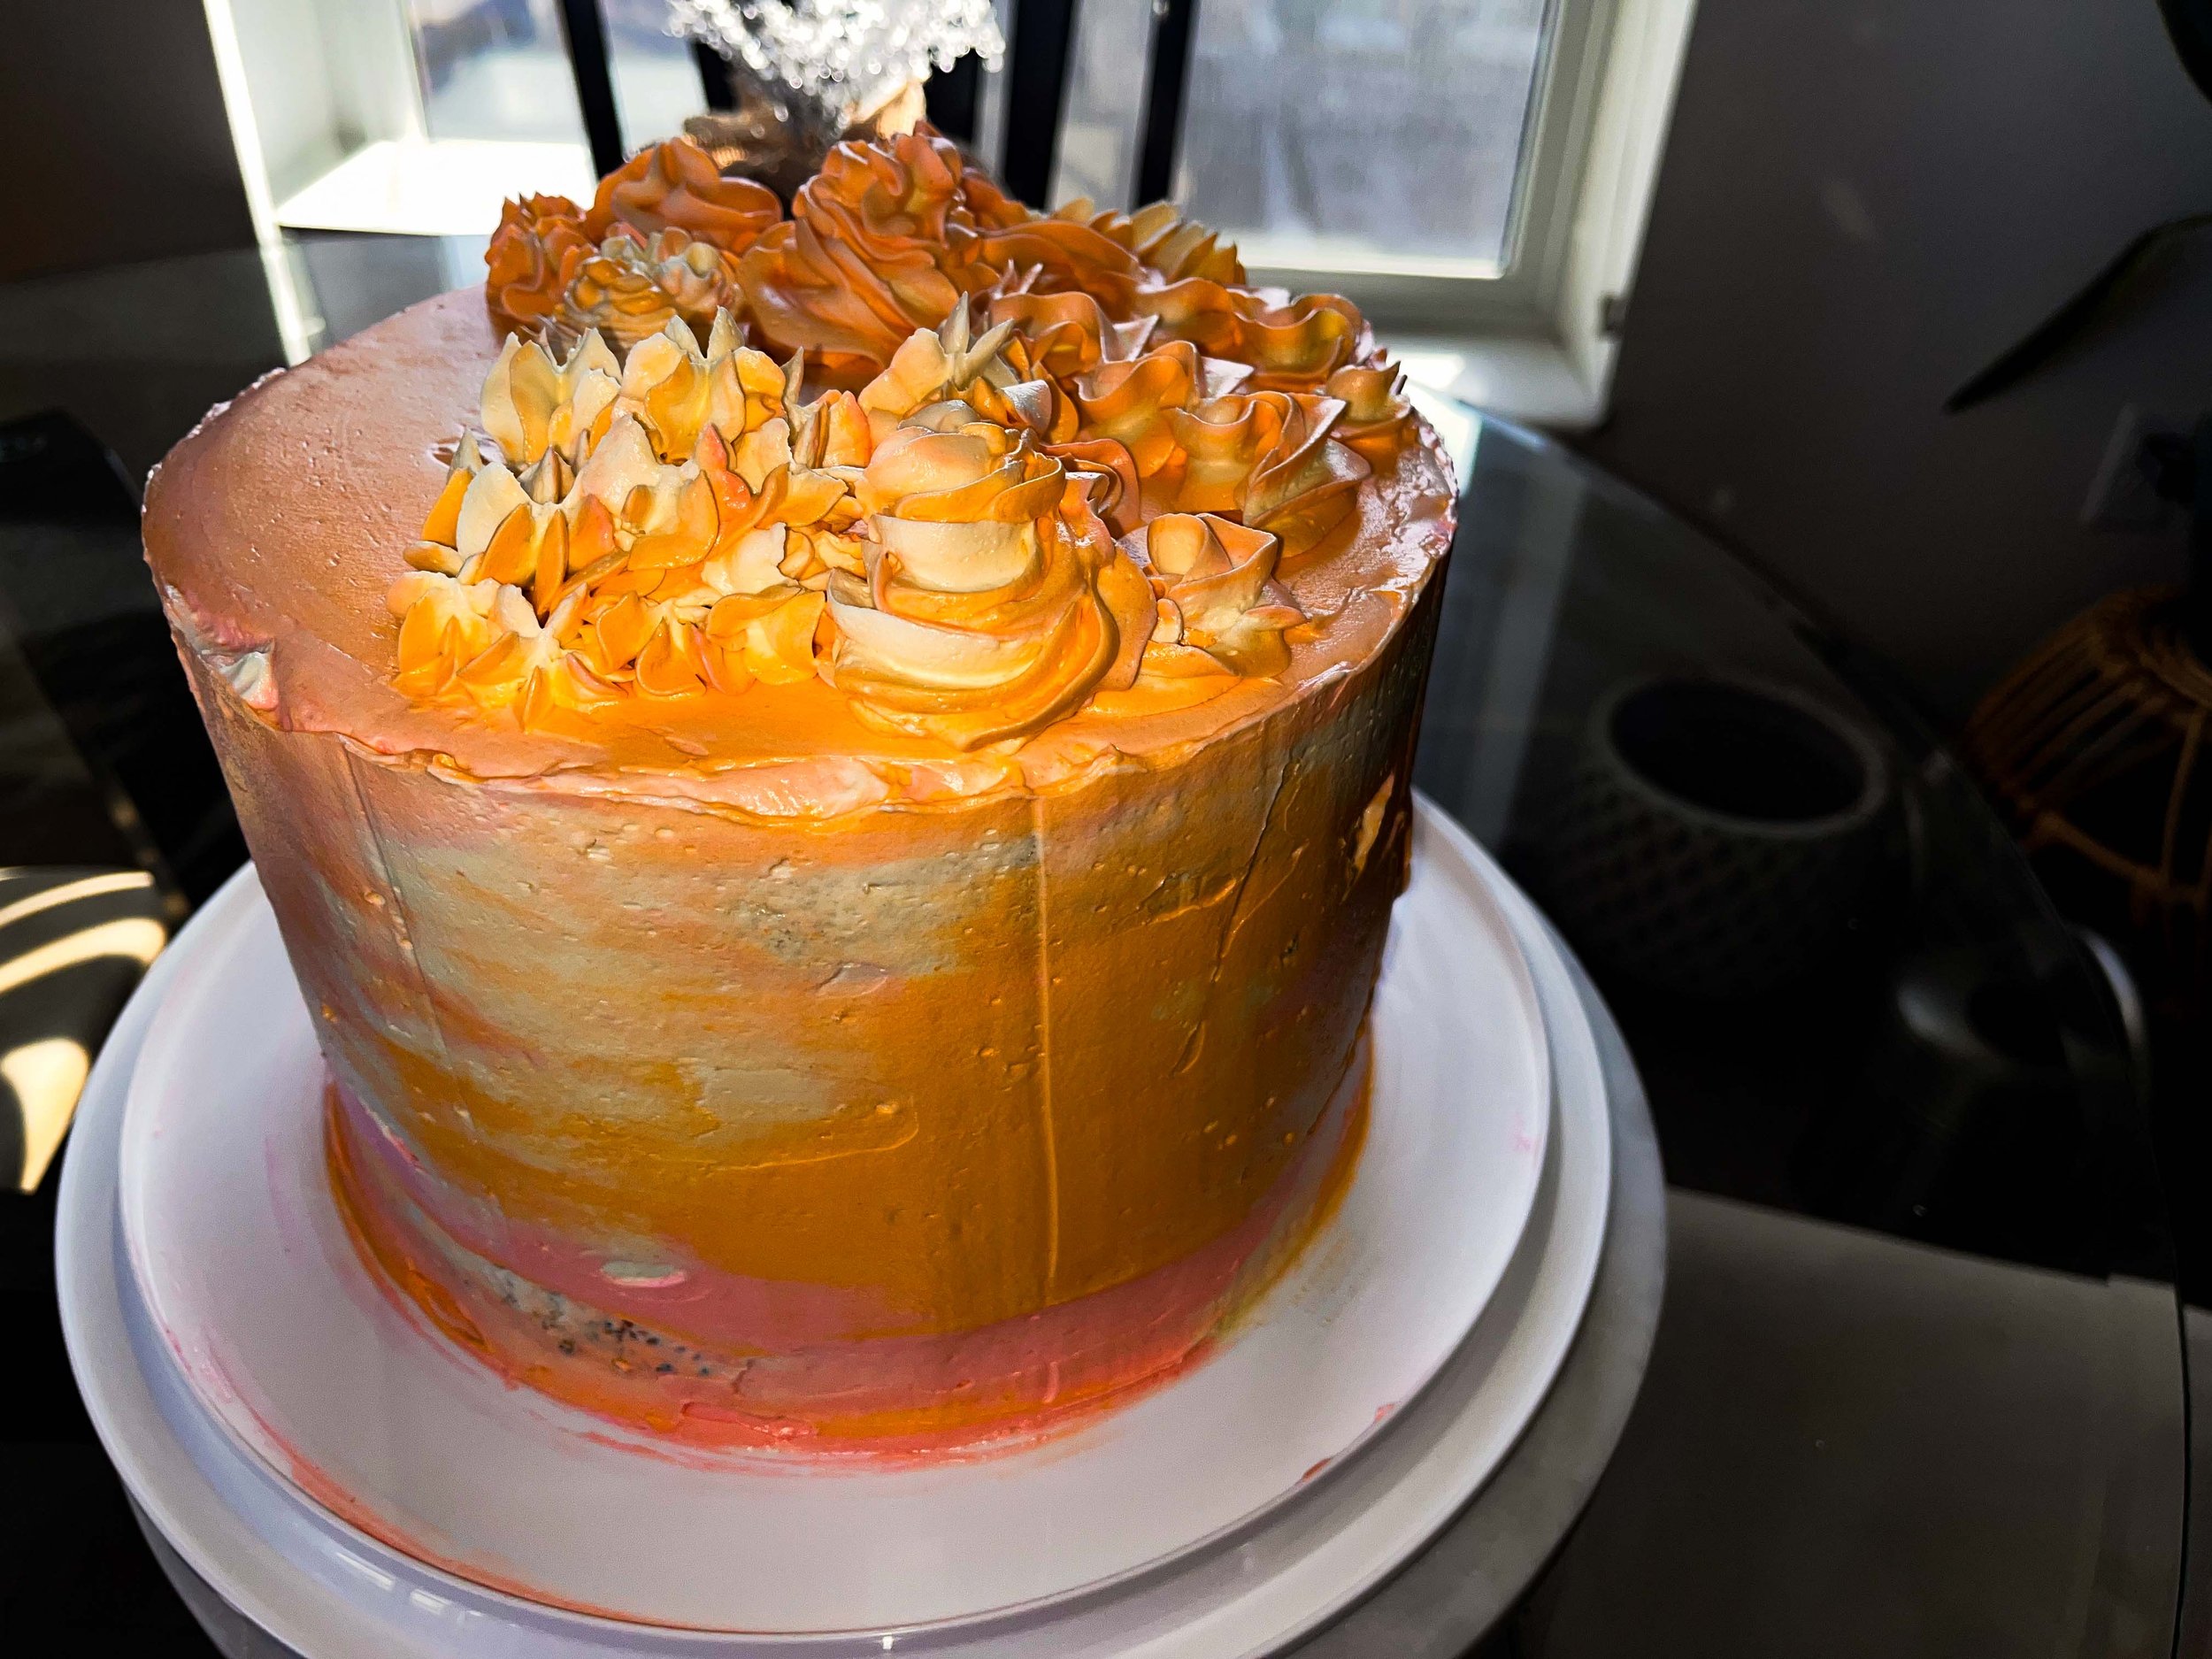
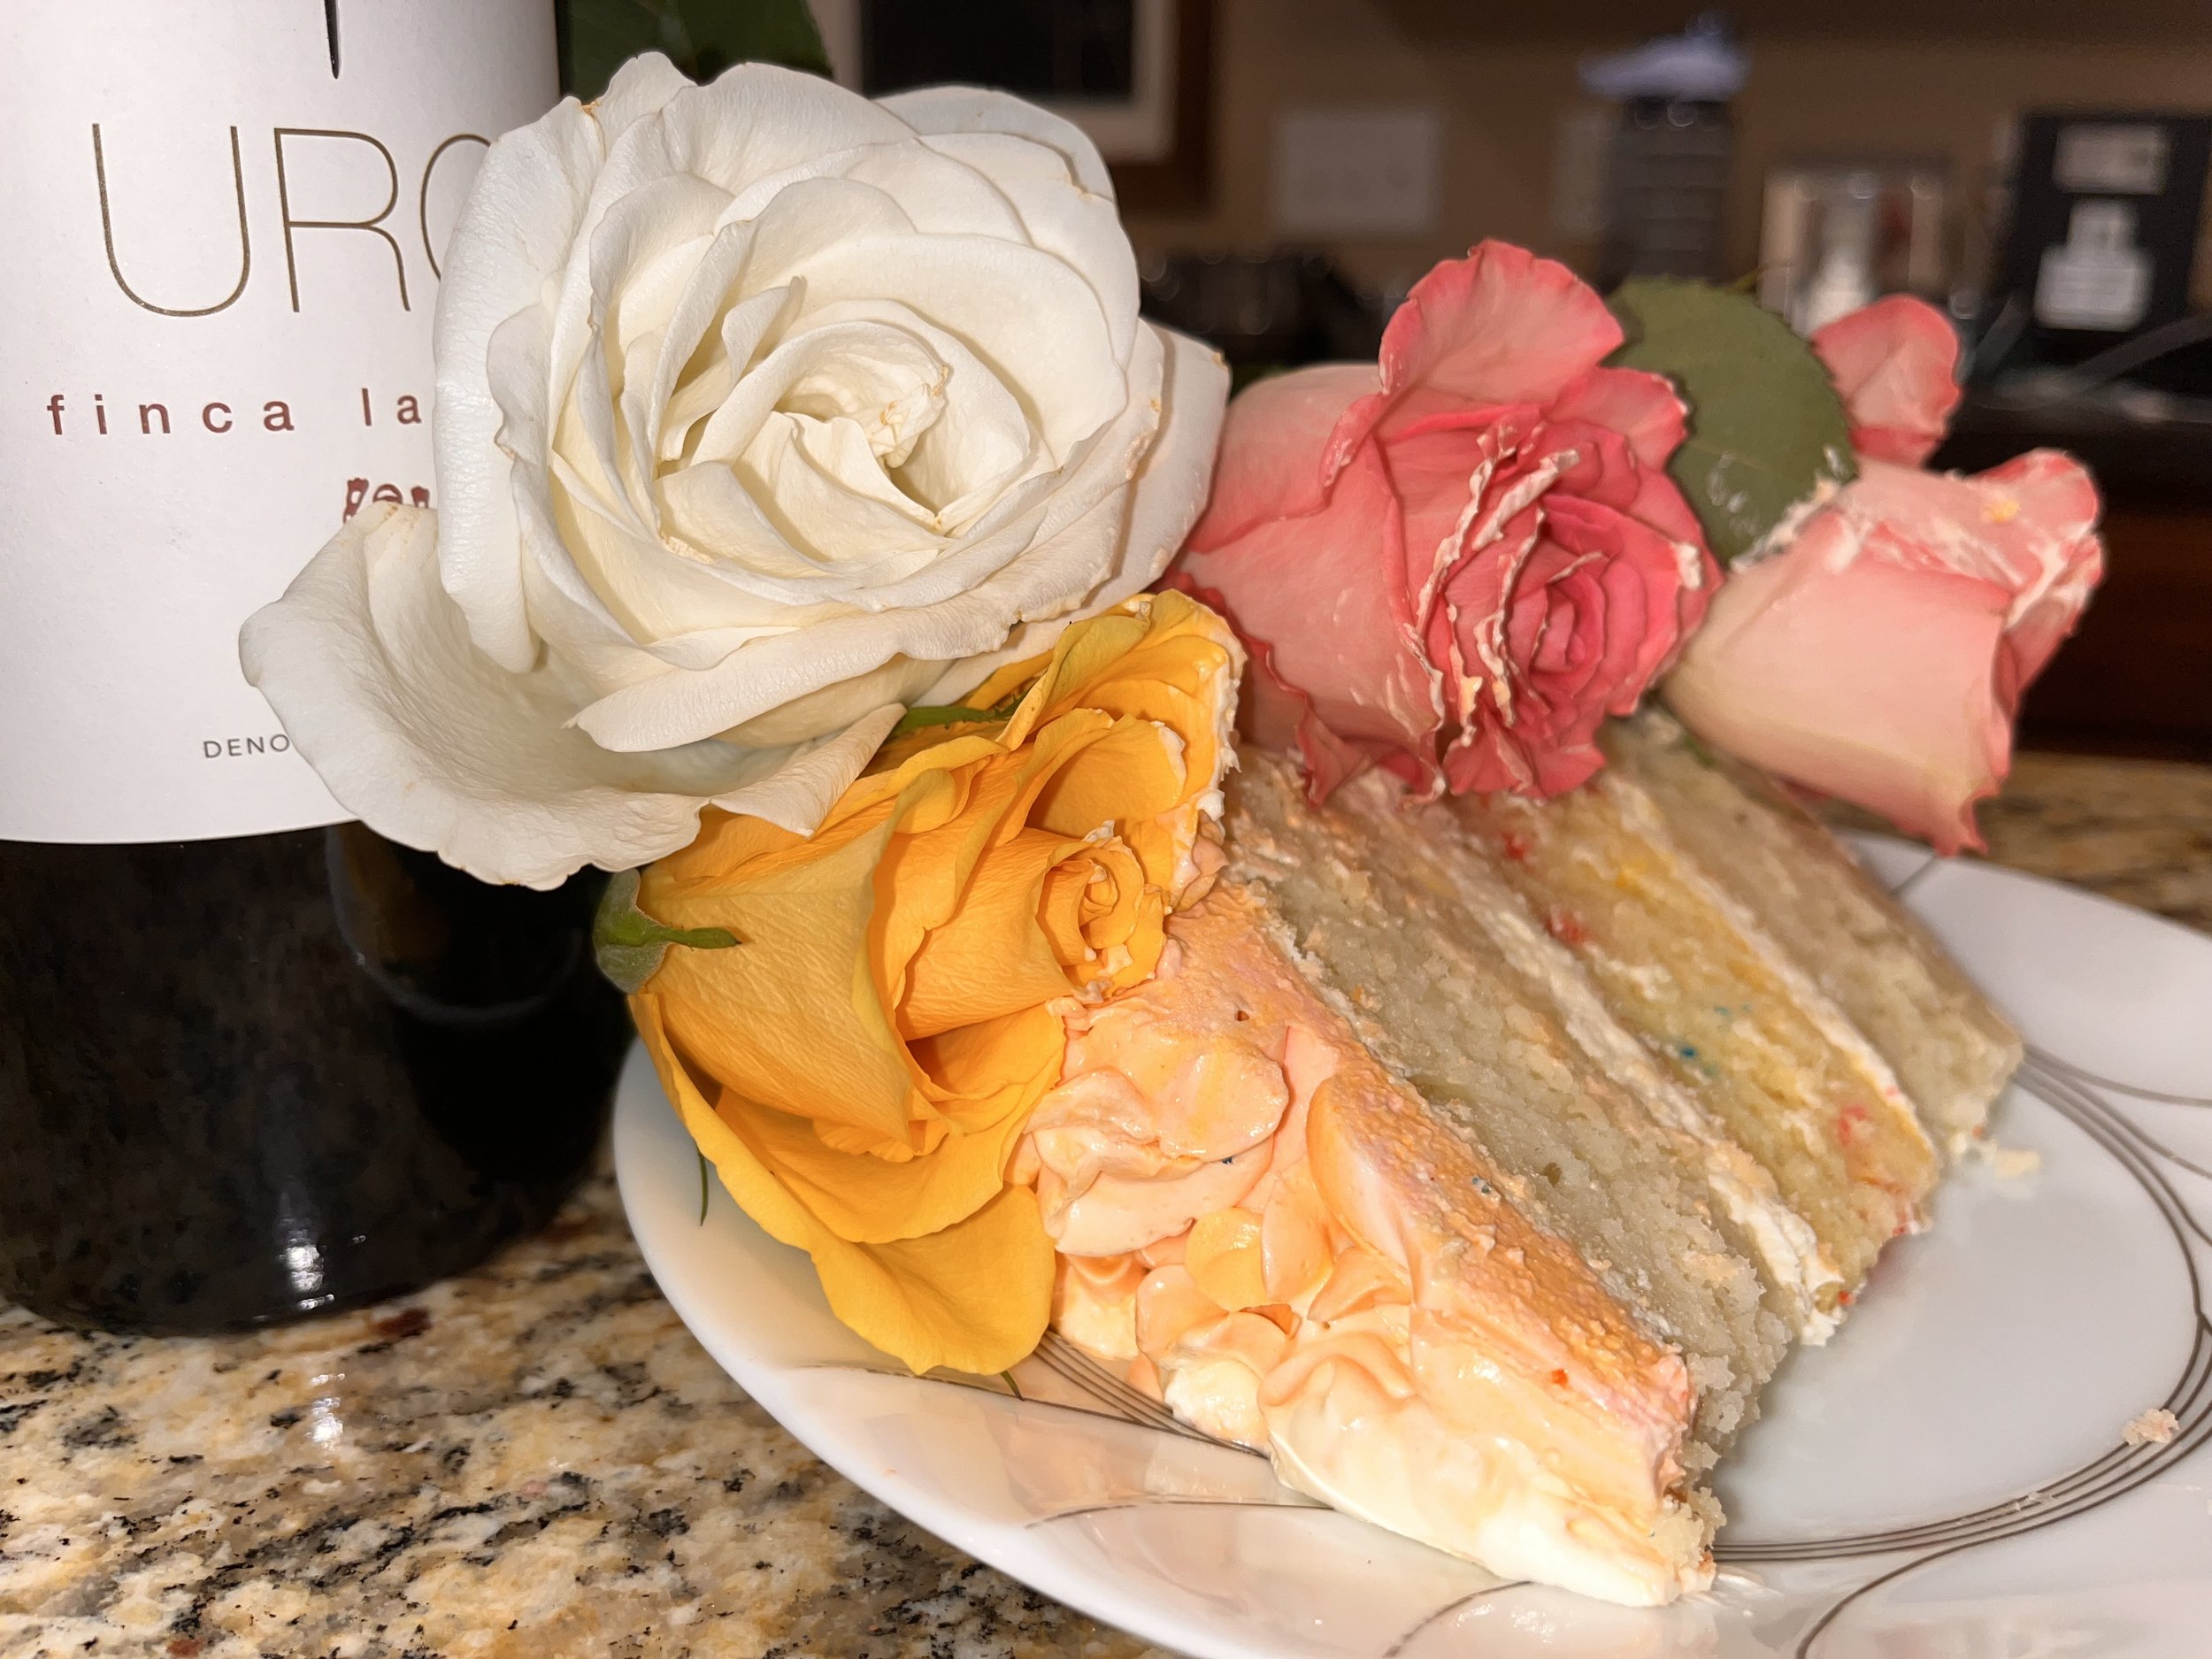
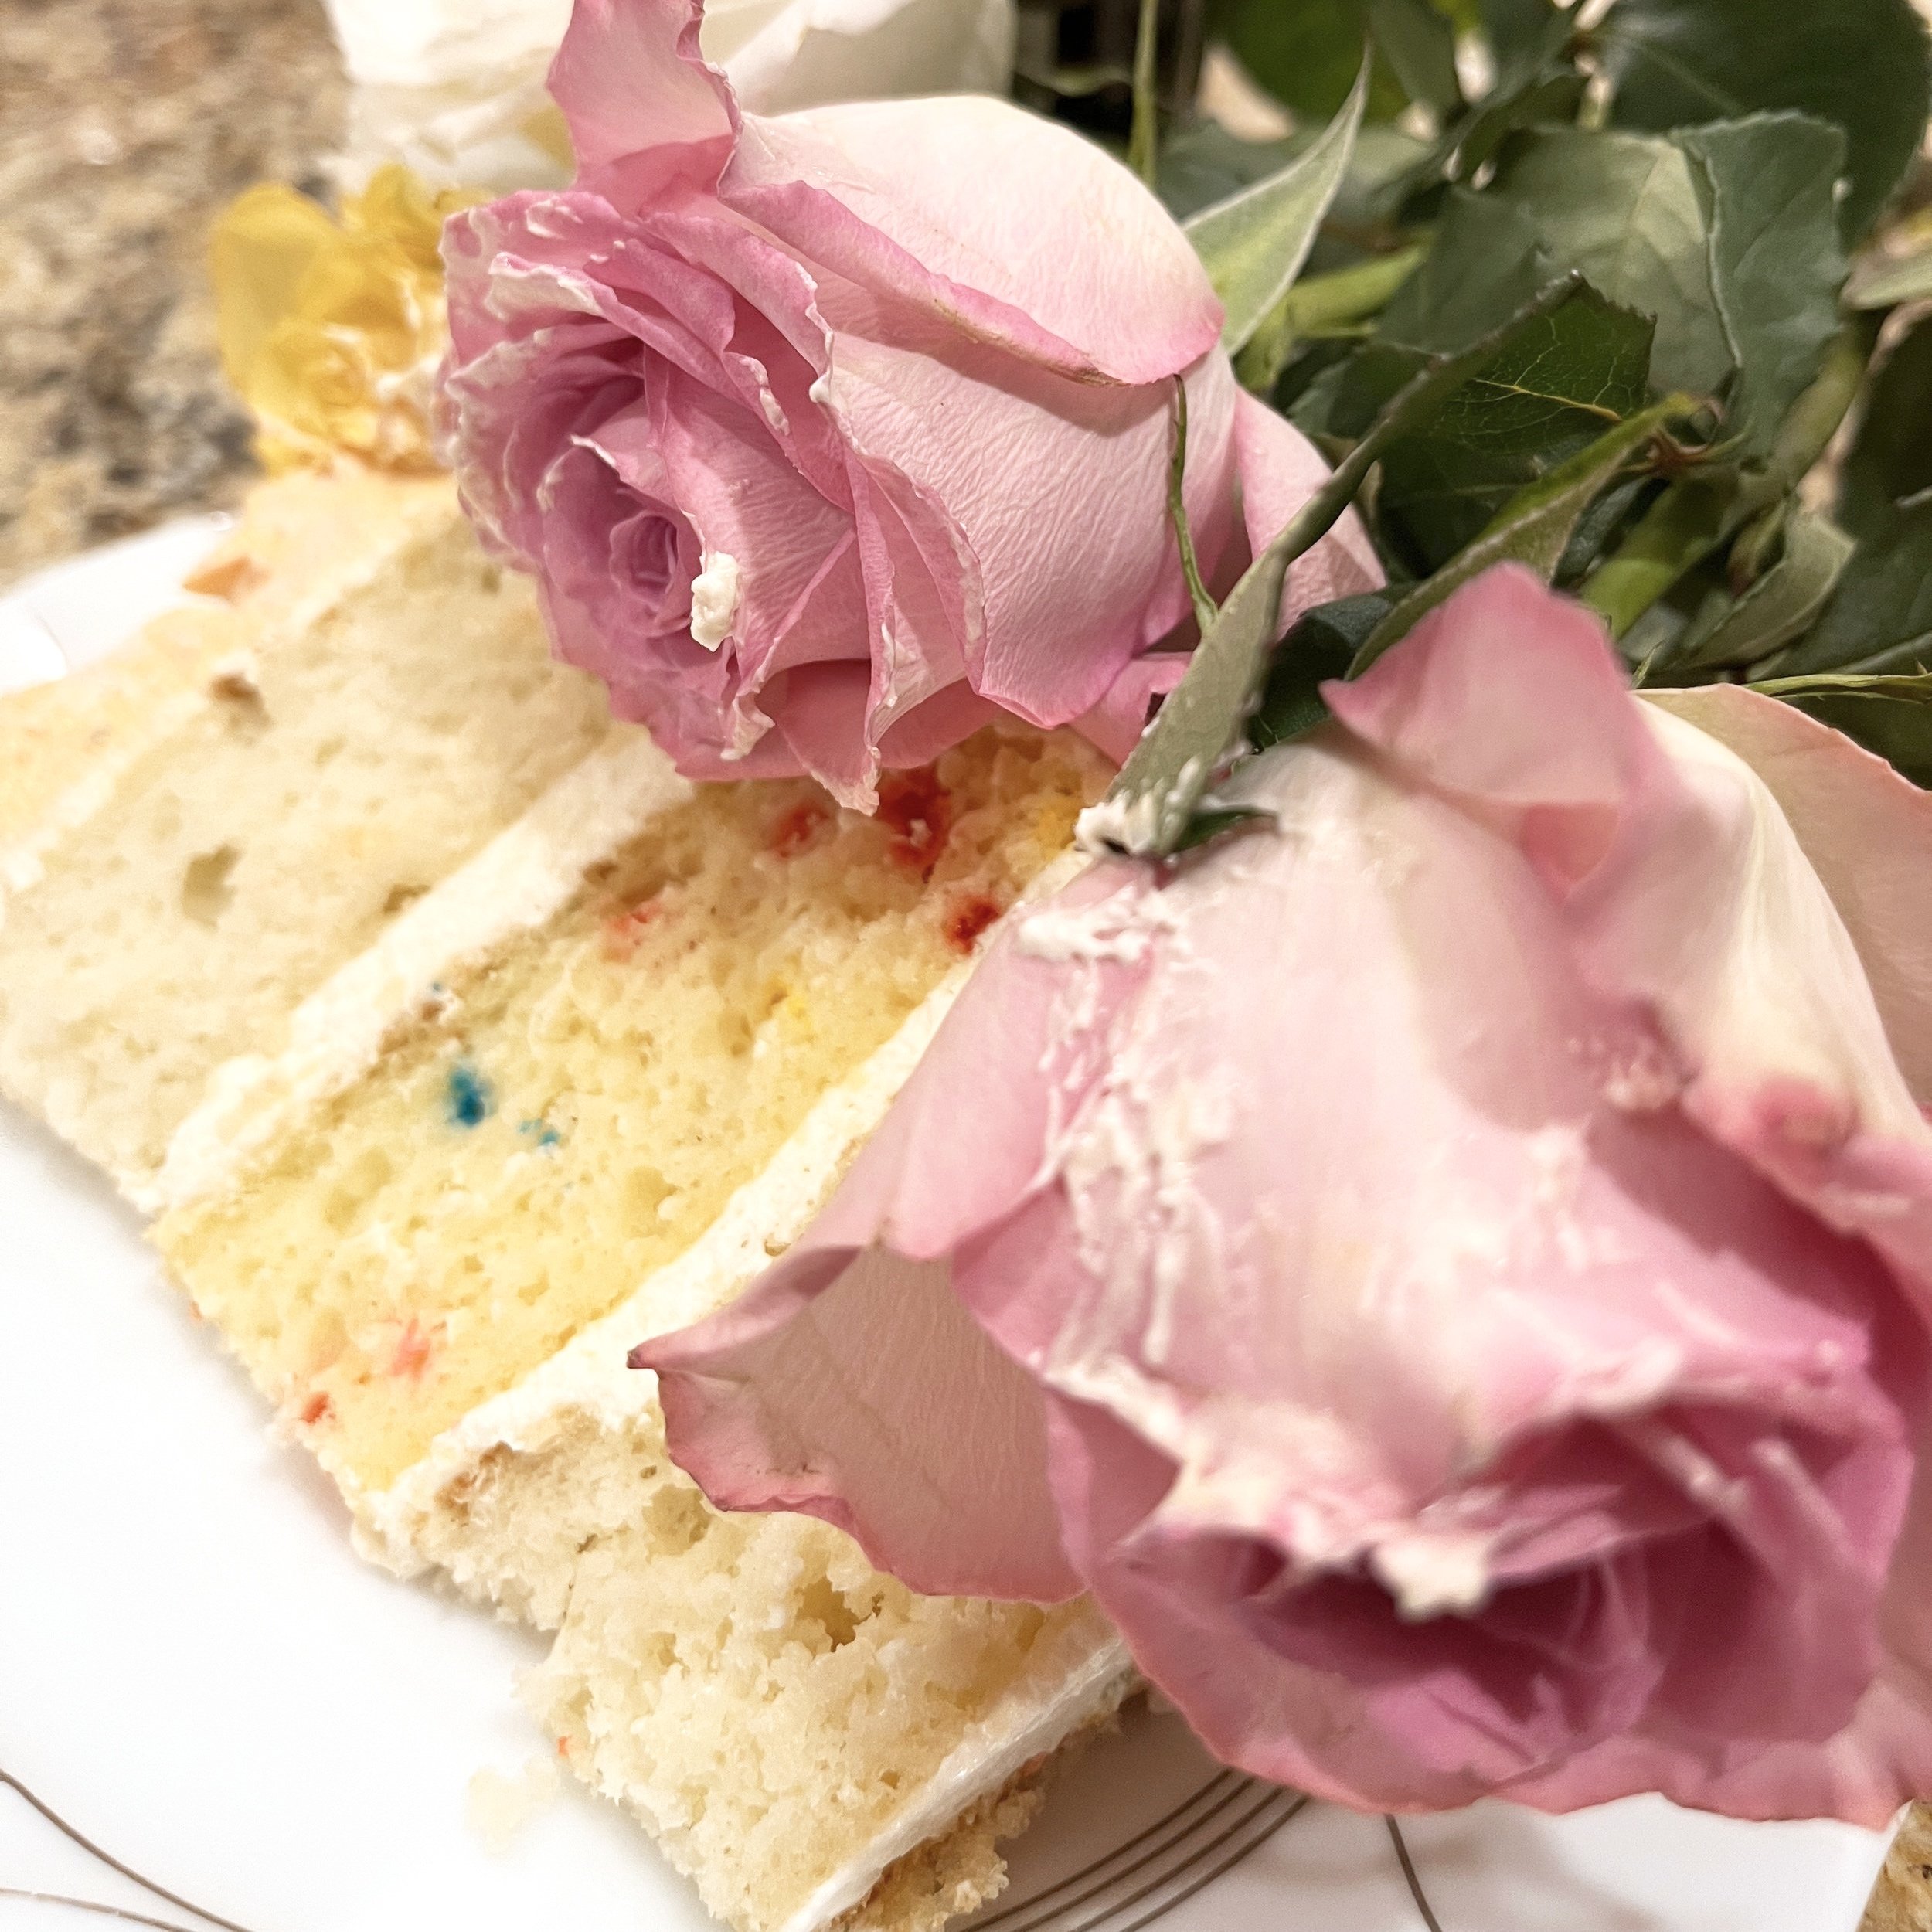
If this were a homemade cake, by now you would be spent and might opt for a plain design for the cake. Given the ease of the process so far, you have more time to express your creativity! There is not much I can say about assembling a cake except for that it can be heartbreaking if your cake cracks or tips over. Just make sure to handle it carefully and do not rush the process. For this cake, I used one box of Funfetti and one box of white cake mix so I decided to alternate the tiers between the two flavors. I kept the frosting in the layers white and decided to use 3 different gel food colorings for the outside. For a nicer looking, smoother finish, I use a turntable and a bench scraper for easy decorating. I used to manually spin the cake on the island by hand and the cake looked a mess, but it still tasted good and that is all that matters. Do what works for you - you are almost there.
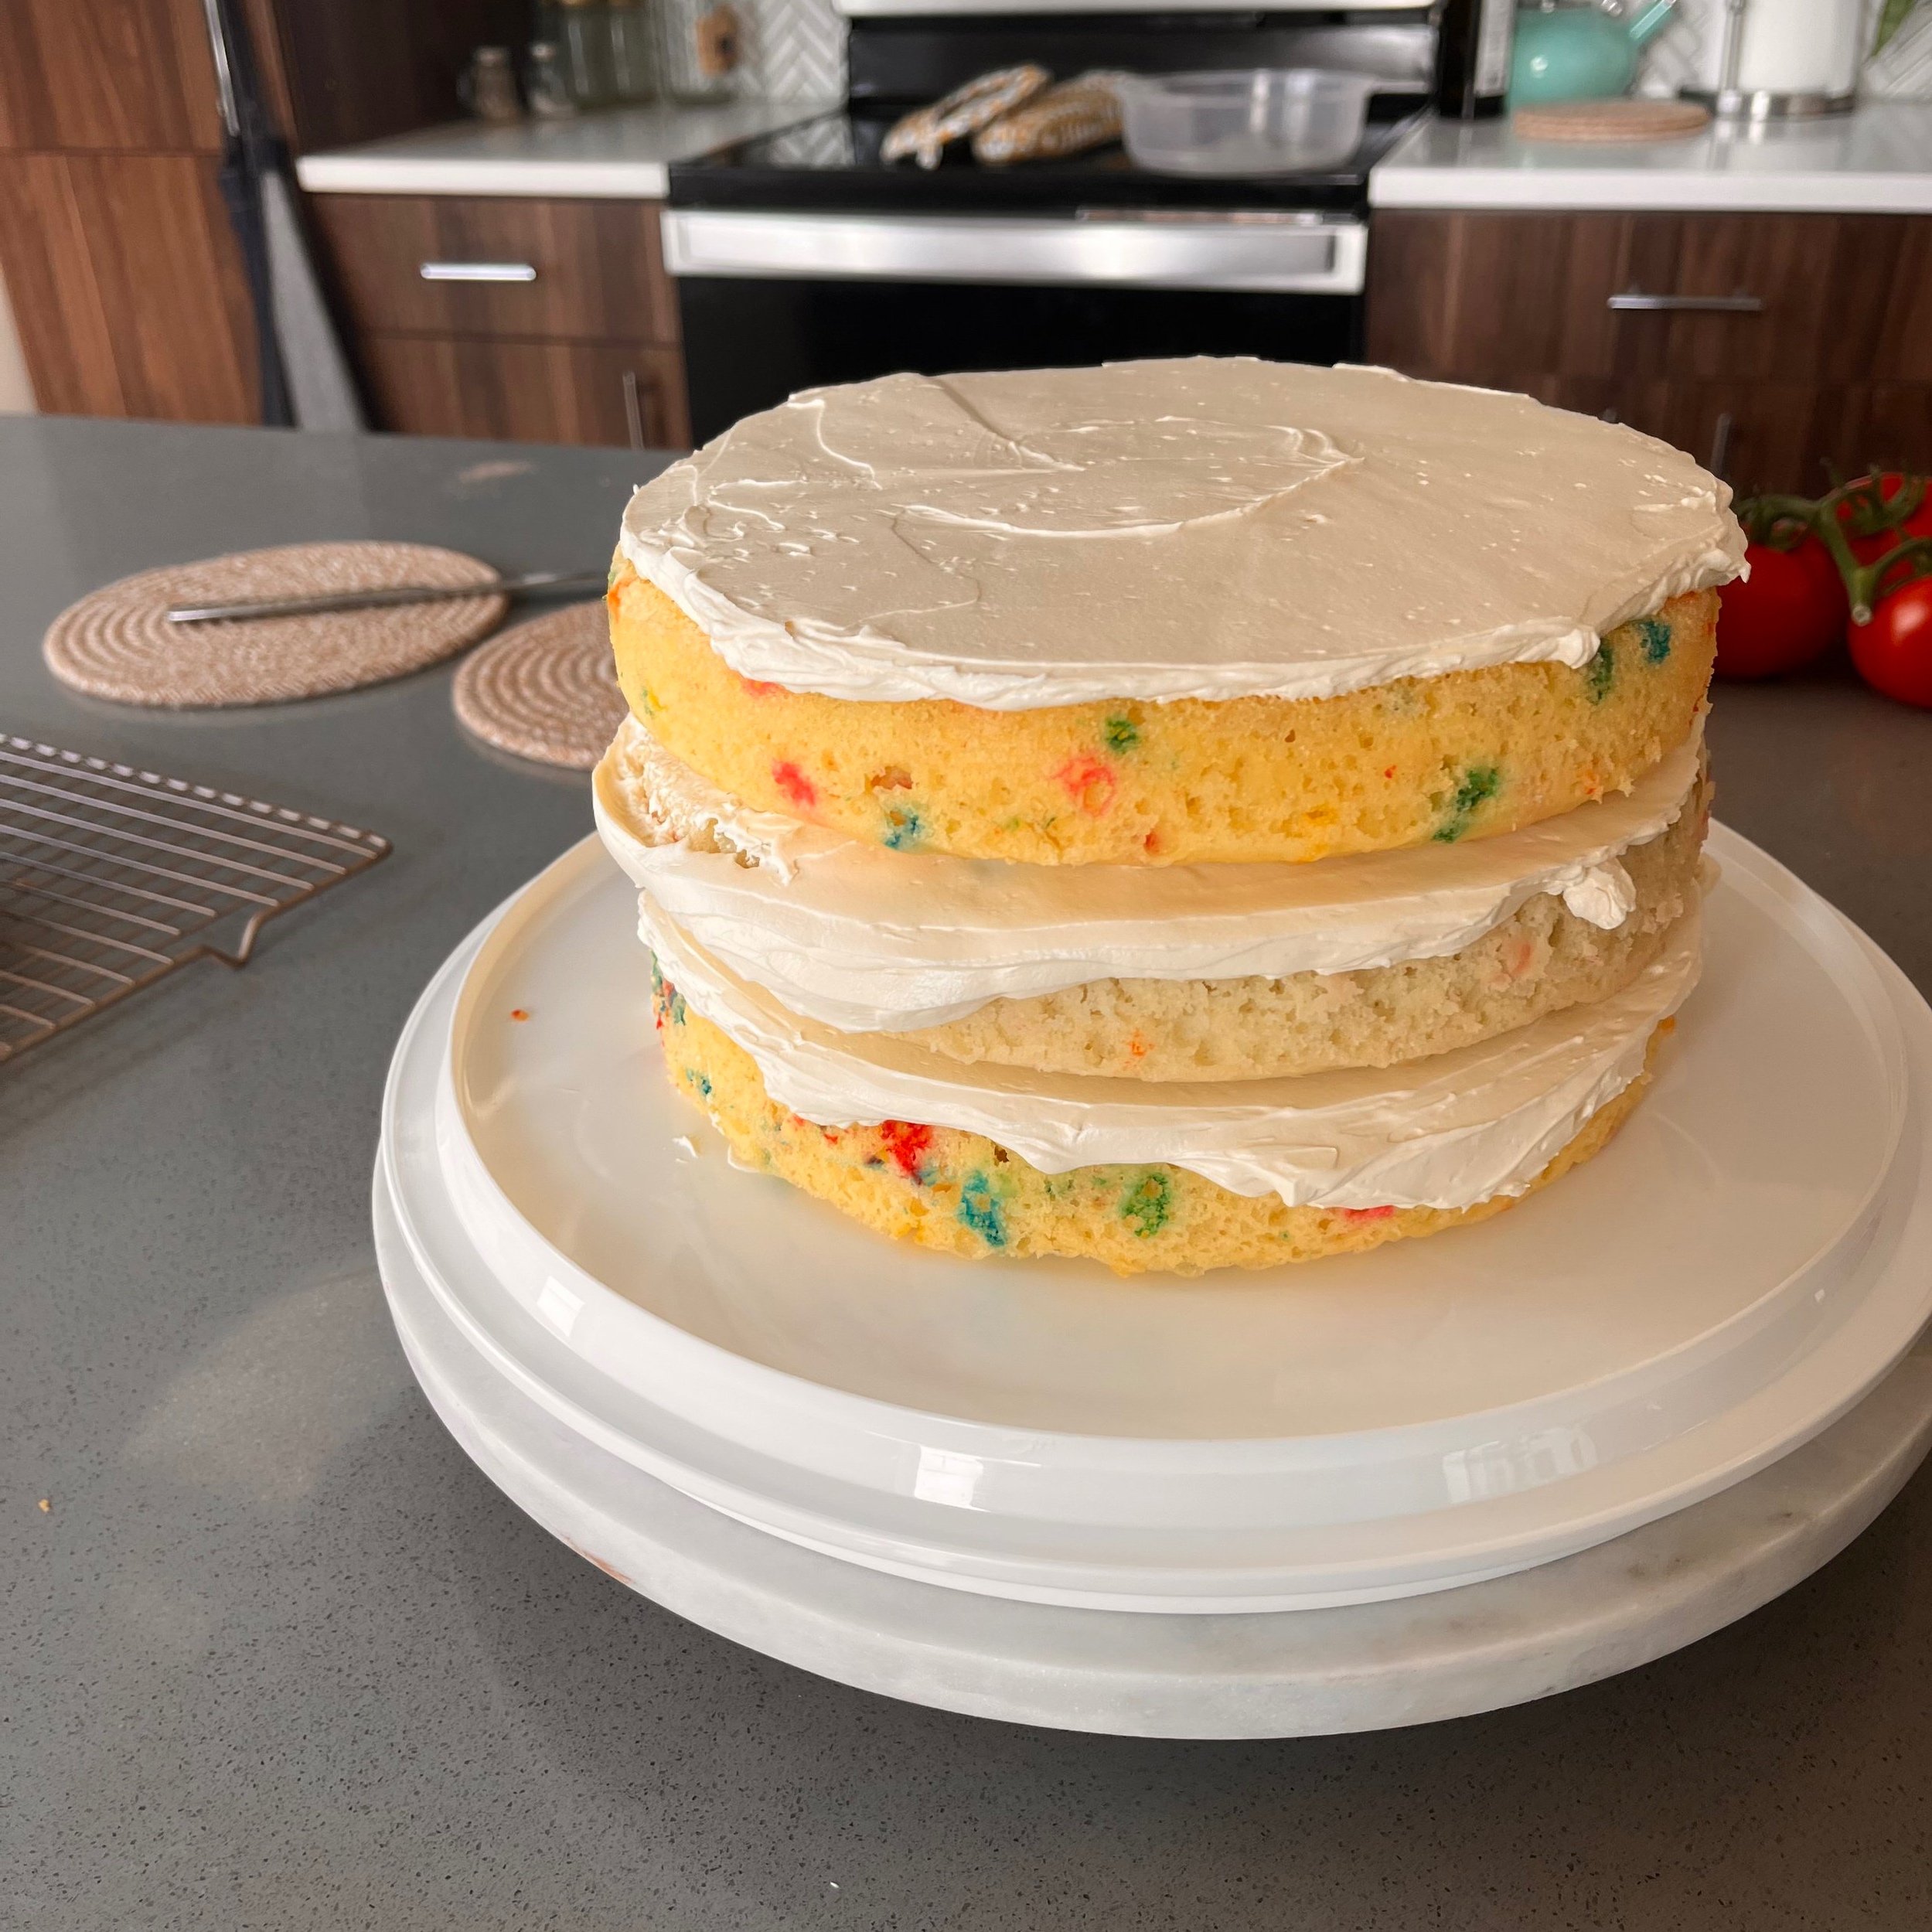
Before adding the final cake layer
And it’s lookin’ like sum’n!


This is how it feels.
Every. Single. Time.